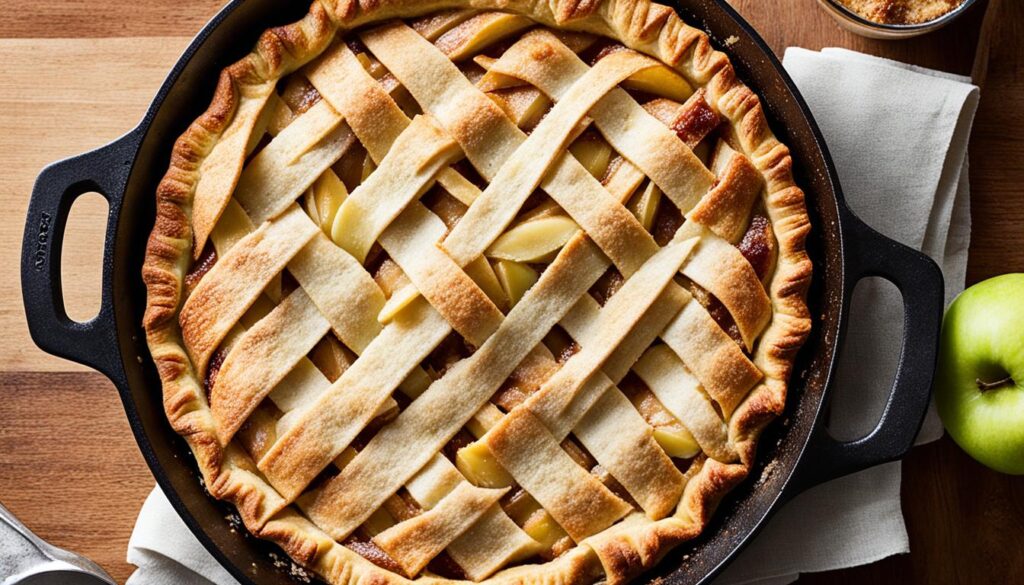
I’ve been making cast iron apple pie for years, and it’s always a hit with my family and friends. There’s something special about the combination of tender apples, flaky crust, and the smoky flavor of a well-seasoned cast iron skillet. It’s a recipe that’s been passed down through generations, and I’m excited to share it with you today. The best part about this recipe is that it’s incredibly easy to make, even for those who are new to baking.
With just a few simple ingredients and some basic cooking techniques, you can have a delicious homemade pie in no time. Growing up, my grandmother would make apple pie for every family gathering. She’d spend hours in the kitchen, carefully peeling and slicing the apples, mixing the filling, and rolling out the dough. It was always a labor of love, but the end result was worth all the effort.
Her pies were always perfectly balanced between sweet and tart, with a flaky crust that would crumble into tender bits as you took your first bite. To this day, I still make her recipe whenever I can. The health benefits of this recipe are numerous. Not only is it made with wholesome ingredients like apples and flour, but it’s also relatively low in calories compared to other types of pie.
Plus, the cast iron skillet adds a nice smoky flavor that complements the sweetness of the apples perfectly. Whether you’re serving it at a family gathering or just need a comforting dessert for yourself, this cast iron apple pie is sure to hit the spot. One thing I love about this recipe is how adaptable it is to different tastes and preferences. Want to add some cinnamon or nutmeg to give it an extra boost of flavor?
Go for it! Prefer a gluten-free crust? No problem! The beauty of this recipe is that you can adjust it to suit your needs without sacrificing any of its signature qualities.
Cast Iron Apple Pie
4.6 from 1299 votes
A rustic apple pie baked in a cast iron skillet for a perfectly crisp crust and tender, cinnamon-spiced filling. The deep dish ensures plenty of juicy apples in every bite, and the skillet creates a beautifully golden bottom crust.
6 cups peeled, sliced Granny Smith apples (about 6 apples)
1/2 cup granulated sugar
1/4 cup packed brown sugar
2 tbsp all-purpose flour
1 tsp ground cinnamon
1/4 tsp ground nutmeg
1/4 tsp salt
1 tbsp lemon juice
2 tbsp cold unsalted butter, cut into small pieces
For the Topping
1 large egg, beaten
1 tbsp coarse sugar (such as turbinado)
👨🍳Directions
1Make the crust: In a large bowl, whisk together flour, salt, and sugar.
2Cut in cold butter using a pastry blender or your fingers until the mixture resembles coarse crumbs with some pea-sized butter pieces.
3Drizzle ice water and vinegar over the mixture, stirring with a fork until the dough just comes together.
4Do not overmix.
5Divide the dough into two disks, wrap each in plastic wrap, and refrigerate for at least 1 hour.
6Meanwhile, preheat your oven to 400°F (200°C).
7Make the filling: In a large bowl, toss the apple slices with granulated sugar, brown sugar, flour, cinnamon, nutmeg, salt, and lemon juice until evenly coated.
8Set aside to allow the apples to release some juice.
9Roll out one dough disk on a lightly floured surface into a 12-inch circle.
10Gently press it into the bottom and up the sides of the cast iron skillet, letting the excess dough hang over the edges.
11Spoon the apple filling into the crust and dot with the small butter pieces.
12Roll out the second dough disk into an 11-inch circle.
13Place it over the filling, then fold the overhanging bottom crust over the top crust and crimp the edges to seal.
14Cut several slits in the top crust to allow steam to escape.
15Brush the top crust with the beaten egg and sprinkle with coarse sugar.
16Place the skillet on a baking sheet to catch any drips.
17Bake at 400°F for 20 minutes, then reduce the oven temperature to 375°F and bake for an additional 30-35 minutes, until the crust is deep golden brown and the filling is bubbling through the slits.
18Let the pie cool in the skillet on a wire rack for at least 1 hour before serving.
For a deeper flavor, let the sliced apples macerate with the sugars and spices for 15 minutes before filling. If the crust edges brown too quickly, cover them with foil during the last 15 minutes of baking.
Watch Video Of How Cast Iron Apple Pie Works
This cast iron apple pie is always a good idea for any occasion from a casual family dinner to a holiday gathering. The skillet makes it easy to transport and serve right at the table which saves on dishes and cleanup.
I love that I can make it ahead and reheat it without losing any of the texture or flavor. For storage keep the pie covered at room temperature for up to two days or refrigerate it for longer freshness.
To reheat just pop the skillet in a 350 degree oven for ten minutes and it tastes just like fresh baked. Serve it warm with a scoop of vanilla ice cream or a drizzle of caramel sauce for an extra special treat.
This recipe has become a tradition in my home and I hope it becomes one in yours too.
❓ Frequently Asked Questions About Cast Iron Apple Pie
What type of apples should I use for this recipe?
For this recipe, you’ll want to use a combination of sweet and tart apples to get that perfect balance of flavors. A mix of Granny Smith and Gala or Honeycrisp works beautifully.
Can I use pre-made pie crust instead?
No! Using pre-made crust will alter the texture and taste of your pie significantly. Take the time to make your own dough from scratch for the best results.
Do I need to grease my cast iron skillet?
A well-seasoned cast iron skillet doesn’t require any additional greasing before baking. However, if you’re using a new skillet or one that’s not well-seasoned, apply some oil or butter to prevent sticking.
Can I store leftovers in an airtight container?
Yes! Store your leftover pie in an airtight container at room temperature for up to 3 days or refrigerate for up to 5 days. Reheat slices in the oven until warm before serving.
How do I reheat my pie without drying out the filling?
To reheat your pie without drying out the filling, place slices on a baking sheet lined with parchment paper and bake at 350°F (175°C) for 10-15 minutes until warmed through.
This is a quick and easy frosting made with butter, powdered sugar, and vanilla. It is perfect for cakes, cupcakes, or cookies and can be made in minutes. The c…
This slow cooker version of chicken cordon bleu delivers tender chicken breasts stuffed with ham and Swiss cheese in a creamy Dijon sauce. It is a fuss free din…
A decadent layered dessert featuring fudgy brownie chunks, creamy vanilla pudding, and fluffy whipped cream. This easy no-bake trifle is perfect for parties and…
A rich and creamy frosting made with cream of coconut, perfect for cakes and cupcakes. This dairy-free frosting is sweet and luscious with a tropical flavor. It…
A festive Mardi Gras king cake filled with a sweet cream cheese filling and topped with colorful icing and sprinkles. This yeasted cake is baked until golden an…