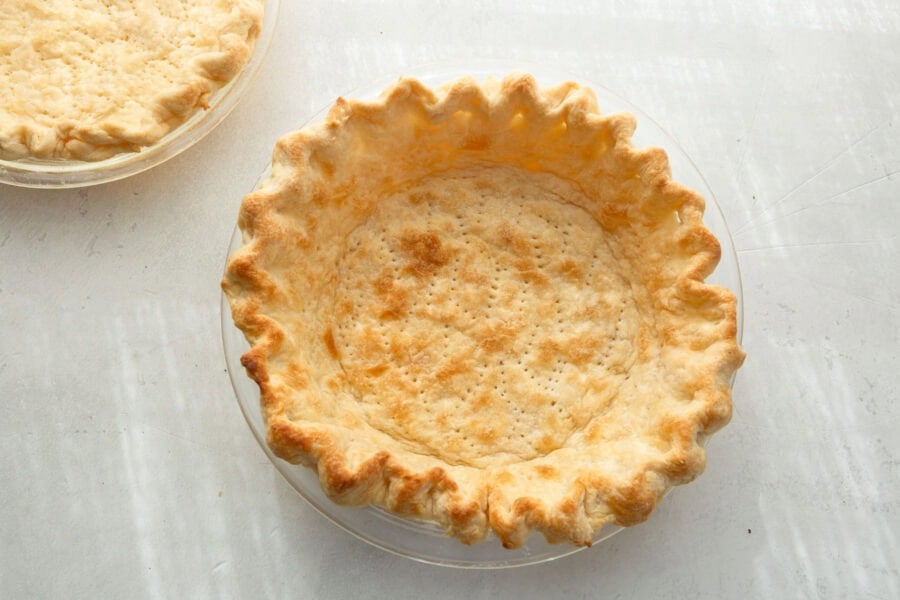
I’ve been making scratch pie crust for years, and it’s still one of my go-to recipes for any occasion. There’s something about the simplicity of a homemade pie crust that just can’t be beat. I love that it’s a recipe that’s been passed down through generations, and it’s a great way to connect with my family’s heritage.
My kids always get so excited when I’m making a pie from scratch, and they love helping me mix and roll out the dough. It’s a great way to spend quality time together and create memories that will last a lifetime. I’ve experimented with many different types of flour over the years, but I always come back to all-purpose flour for my pie crust.
There’s just something about the way it holds together and bakes up nice and flaky that I haven’t been able to replicate with other types of flour. And let’s be real, who doesn’t love the smell of butter and pastry wafting through the house as you’re baking? One thing that sets this recipe apart is the key home cooking technique involved in making a good scratch pie crust.
It’s all about keeping your ingredients cold and handling the dough as little as possible to prevent it from becoming tough. I’ve found that using cold water and keeping the butter in small pieces helps to prevent the dough from getting too warm and sticky. This recipe makes two pies, so you can easily double or triple it if you need to make more.
I like to keep a batch on hand in the freezer for when I need a quick dessert or snack. And because this recipe uses cold ingredients, you can easily make it ahead of time and store it in the fridge or freezer until you’re ready to bake. I love serving this pie at family gatherings because everyone loves it, and it’s such an impressive dessert to serve.
And let’s be real, who doesn’t love the idea of having a freshly baked pie waiting for them at home?
Classic Scratch Pie Crust Recipe
4.5 from 728 votes
This homemade pie crust recipe is simple to make and perfect for both sweet and savory pies. With just a few basic ingredients, you can create a flaky, delicious crust that will elevate any pie filling.
1In a large mixing bowl, combine the flour, salt, and sugar.
2Mix well to ensure all ingredients are evenly distributed.
3Add the cold, cubed butter to the dry ingredients.
4Using a pastry cutter or fork, cut the butter into the flour mixture until it resembles coarse crumbs with a few pea-sized pieces of butter remaining.
5This will create a flaky texture in the crust.
6Gradually add the ice-cold water, one tablespoon at a time, mixing gently with a fork until the dough just comes together.
7Be careful not to add too much water, as this can make the crust tough.
8The dough should be slightly crumbly but hold together when pressed.
9If the dough is too dry, add a bit more water.
10If it is too wet, add a bit more flour.
11Turn the dough out onto a lightly floured surface and knead gently a few times to bring it together.
12Form the dough into a flat disk, wrap it in plastic wrap, and refrigerate for at least 30 minutes.
13This resting period allows the gluten to relax, making the crust easier to roll out and preventing it from shrinking during baking.
14On a lightly floured surface, roll out the chilled dough into a circle about 1/8-inch thick and 2 inches larger than your pie dish.
15To transfer the dough to the pie dish, carefully roll it onto the rolling pin and unroll it over the dish.
16Gently press the dough into the pie dish, making sure it fits snugly into the bottom and sides.
17Trim the excess dough, leaving about 1 inch of overhang.
18Fold the overhang under itself to create a thicker edge, and crimp the edges with your fingers or a fork.
19Preheat your oven to 425°F (220°C).
20To prevent the crust from puffing up during baking, prick the bottom and sides of the crust with a fork.
21Line the crust with parchment paper and fill it with pie weights or dried beans.
22This will help the crust maintain its shape and prevent it from shrinking.
23Bake for 15-20 minutes, or until the edges of the crust are lightly golden.
24Remove the pie weights and parchment paper, and continue baking for an additional 5-10 minutes, or until the bottom of the crust is lightly golden.
25Allow the crust to cool completely before filling and baking with your desired pie filling.
Tips: You can substitute whole wheat flour for a healthier option. For a deeper flavor, use butter that has been aged for at least 3 months. Avoid overworking the dough, as this can make the crust tough.
Watch Video Of How Classic Scratch Pie Crust Recipe Works
One thing that sets this recipe apart is its versatility – whether you’re looking for a quick dessert or snack or an impressive show-stopping dessert for your next family gathering, this scratch pie crust is always a good idea.
It stores well in an airtight container on the counter for up to three days or in the freezer for up to three months.
❓ Frequently Asked Questions About Scratch Pie Crust
What type of flour should I use for this recipe?
I recommend using all-purpose flour for this recipe, as it provides a nice balance of strength and tenderness in the finished crust.
Can I make this recipe ahead of time?
Yes, you can make this recipe ahead of time by storing it in the fridge or freezer until you’re ready to bake.
How do I prevent my pie crust from becoming too warm and sticky?
To prevent your pie crust from becoming too warm and sticky, make sure to keep your ingredients cold and handle the dough as little as possible.
Can I use other types of fat besides butter in this recipe?
Yes, you can use other types of fat besides butter in this recipe, but keep in mind that they may affect the flavor and texture of the finished crust.
How do I know if my pie crust is overworked?
If your pie crust becomes too dense or tough, it may be a sign that you’ve overworked it. Try starting again with fresh dough if this happens.
Can I freeze this recipe for later use?
Yes, you can freeze this recipe for later use by storing it in an airtight container or plastic bag.
A quick and hearty one-pan meal featuring smoked sausage, tender potatoes, and colorful bell peppers. This skillet dinner is perfect for busy weeknights and del…
A quick and satisfying bean burrito filled with seasoned refried beans, cheese, and your favorite toppings. Perfect for a weeknight dinner or a simple lunch, th…
This dairy-free cashew nut cream cheese is incredibly smooth and rich, with a mild, nutty flavor. It’s perfect for spreading on bagels, adding to sandwiches, or…
A creamy and tropical cocktail that combines the rich flavor of coconut with the warmth of rum. This drink is perfect for sipping by the pool or at a summer par…