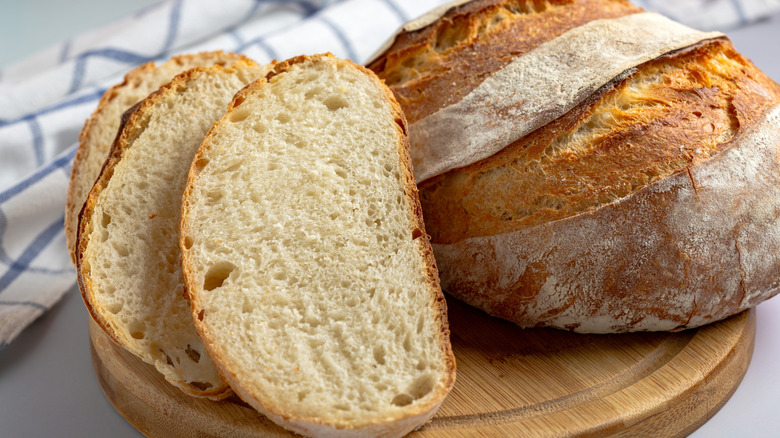
I’ve been making sourdough starter bread for years, and it’s still one of my family’s favorite recipes. My kids love helping me mix and knead the dough, and my husband always asks for seconds when I serve it with dinner.
There’s something special about biting into a warm, crusty loaf that’s been lovingly crafted over several hours. The process of creating a sourdough starter is almost magical – you get to see the mixture transform from a simple combination of flour and water into a living, breathing entity that will eventually produce a delicious loaf of bread.
I love watching my starter come to life in the morning, as the bubbles start to rise and the smell of fermentation fills the air. It’s a sensory experience that never gets old, and I feel so lucky to be able to share this passion with my family.
Sourdough starter bread is perfect for any occasion – whether you’re hosting a dinner party or just want something special for a weeknight meal. And let’s be real – who doesn’t love the idea of baking their own bread at home?
It’s a skill that’s been lost in recent years, but one that I’m so glad we’re preserving in our family. The health benefits of sourdough bread are numerous – it’s made with only three ingredients: flour, water, and salt.
No additives or preservatives necessary! Plus, the slow fermentation process breaks down some of the gluten in the flour, making it easier to digest for those with sensitive stomachs.
Sourdough Starter Bread Recipe
4.6 from 825 votes
This recipe uses a sourdough starter to create a tangy, flavorful loaf of bread. It requires some planning and patience, but the result is a delicious, homemade loaf.
1First, mix the flour and water in a large bowl until a shaggy dough forms.
2Cover the bowl with a damp cloth and let it rest for 30 minutes.
3This process is called autolyse and helps to develop gluten.
4After 30 minutes, add the starter and salt to the dough.
5Mix well until the starter and salt are fully incorporated.
6The dough will be sticky and may not form a smooth ball.
7This is normal.
8Next, perform a series of stretch and folds.
9With wet hands, gently pull and stretch the dough from one side and fold it into the middle.
10Do this on all four sides, working your way around the bowl.
11Let the dough rest for 30 minutes, then perform another set of stretch and folds.
12Repeat this process three more times, for a total of five sets of stretch and folds over 2. 5 hours.
13After the final set of stretch and folds, let the dough rest for another 30 minutes.
14After the final rest, turn the dough out onto a lightly floured surface.
15Gently shape the dough into a round using a bench scraper or your hands.
16Let the dough rest for 20-30 minutes.
17This is called bench rest.
18After bench rest, shape the dough into a boule or batard using a bench scraper or your hands.
19Place the dough seam-side up in a well-floured banneton or bowl lined with a floured kitchen towel.
20Cover with a damp cloth and let it rise at room temperature for 2-4 hours, or until the dough has almost doubled in size and passes the poke test.
21While the dough is rising, place a Dutch oven or heavy pot with a lid in the oven and preheat to 500°F for at least 30 minutes.
22This will create a hot, steamy environment for baking the bread.
23After the dough has risen, gently turn it out onto a piece of parchment paper.
24Make a few slashes on the surface of the dough using a lame, sharp knife, or razor blade.
25Carefully transfer the dough (along with the parchment) into the preheated Dutch oven.
26Put on the lid and bake for 20 minutes.
27After 20 minutes, reduce the oven temperature to 450°F, remove the lid, and bake for an additional 20-25 minutes, or until the crust is golden brown and the bread registers 205°F-210°F in the center.
28If the bread is browning too quickly, tent it with aluminum foil.
29If the bread is not browning enough, place it directly on the oven rack.
30After baking, remove the bread from the oven and let it cool completely on a wire rack before slicing.
Tips: You can substitute whole wheat flour for a healthier option. The key to a successful sourdough bread is an active starter and patience during the bulk fermentation and proofing process. The dough should be handled gently to avoid deflating it. If the dough is too sticky, use a bench scraper to help shape it. If the dough is too dry, add a small amount of water. If the dough is too wet, add a small amount of flour. The baking time and temperature may vary depending on your oven and the size of your loaf. Use an instant-read thermometer to check the internal temperature of the bread. The bread is done when it registers 205°F-210°F in the center. Let the bread cool completely before slicing to allow the interior to set. This will give you a better crumb structure and a more flavorful bread.
Watch Video Of How Sourdough Starter Bread Recipe Works
One thing I love about this recipe is how well it stores – if you don’t plan on serving it right away, simply wrap your cooled loaves tightly in plastic wrap or aluminum foil and stash them in an airtight container for up to three days.
Reheating slices in the oven brings out their full flavor and aroma – just be sure to slice them before reheating so they don’t get too crumbly!
And if you’re feeling adventurous, try adding different herbs or spices to your dough for added flavor – my kids love when I add dried rosemary or thyme for an extra boost of flavor.
❓ Frequently Asked Questions About Sourdough Starter Bread
Q: What is a sourdough starter?
A: A sourdough starter is a mixture of flour and water that has been allowed to ferment over time, creating a natural yeast culture that will help your bread rise.
Q: How do I create a sourdough starter?
A: To create a sourdough starter, you’ll need to mix equal parts of flour and water in a clean glass or ceramic container. Cover the mixture and let it sit in a warm place for 24-48 hours, feeding it fresh flour and water every 24 hours until it becomes bubbly and active. Once your starter is active, you can use it to make bread!
Q: Can I use store-bought yeast instead of creating my own sourdough starter?
A: While store-bought yeast can produce great results, there’s something special about using a natural yeast culture that has been cultivated over time. Plus, using store-bought yeast can result in bread that lacks depth and complexity – which is where the magic of sourdough comes in!
Q: How long does it take to make sourdough bread from scratch?
A: From start to finish, making sourdough bread can take anywhere from 12-24 hours – but trust me, it’s worth the wait! You’ll need to allow your dough to rise multiple times before baking it off, which can take some patience but yields incredible results.
Q: Can I use whole wheat flour instead of all-purpose flour?
A: Yes! Whole wheat flour makes an amazing sourdough loaf – just be aware that it may have a slightly different flavor profile than all-purpose flour.
This overnight blueberry french toast casserole combines thick slices of bread with a creamy custard and juicy blueberries. It is assembled the night before, al…
This recipe transforms a standard box cake mix into a moist and flavorful cake with simple additions. Perfect for birthdays or any celebration, it delivers a te…
A hearty casserole combining juicy hot dogs, spicy chili, and melted cheese all baked together in a single dish. This comforting meal is perfect for game day or…
This creamy, tangy frosting is infused with toasted coconut for a delightful tropical twist. It pairs perfectly with cakes, cupcakes, or as a filling for layere…
A hearty breakfast casserole with flaky biscuits, savory sausage gravy, and melted cheese. This dish is perfect for feeding a crowd and can be assembled the nig…