syrup for snow cones recipe

syrup for snow cones recipe

The Best syrup for snow cones recipe

I’ve been making this syrup for snow cones recipe for years, and it’s always a hit with my kids. It’s a classic summer treat that’s easy to make and fun to enjoy.

I love how the combination of flavors works together – the sweetness of the syrup pairs perfectly with the crunch of the ice. My kids can’t get enough of this stuff, and I’m happy to oblige them whenever they want it.

I’ve made this syrup for all sorts of occasions, from casual backyard barbecues to more formal gatherings like weddings and parties. It’s a versatile recipe that can be tailored to fit any occasion.

One of the things I appreciate most about this recipe is how easy it is to customize with different flavors and colors. My kids love helping me mix up new concoctions in the kitchen, and it’s a great way to spend quality time together as a family.

Plus, this syrup is ridiculously easy to make – just combine some sugar, water, and food coloring, and you’re good to go! The best part is that this syrup is not only delicious, but it’s also relatively healthy compared to some other frozen treats out there.

It’s made with just a few simple ingredients, so you can feel good about serving it up to your loved ones.
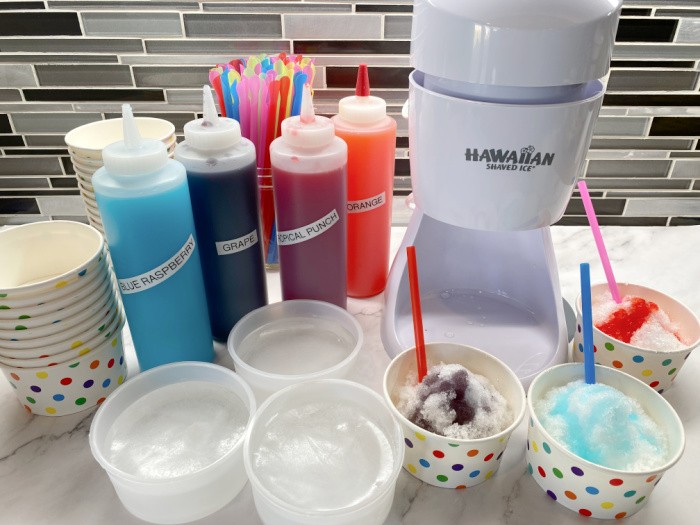
Classic Snow Cone Syrup

Classic Snow Cone Syrup

4.7 from 1291 votes

A simple, homemade syrup for snow cones that yields vibrant, sweet flavors. This recipe uses a basic sugar base that you can customize with your favorite extracts and food coloring.

Prep Time5 mins
Cook Time10 mins
Resting Time0 mins
Total Time15 mins
Servings: 8Cuisine: InternationalCalories: 80 kcal

🥘Ingredients

For the Syrup Base

2 cups granulated sugar
1 cup water

For Flavoring (per batch)

1 teaspoon flavored extract (e.g., cherry, blue raspberry, or lemon)
2-3 drops liquid food coloring (optional)

👨‍🍳Directions

1Combine the sugar and water in a medium saucepan.
2Place the pan over medium-high heat and bring the mixture to a boil, stirring occasionally with a whisk until the sugar is completely dissolved, about 3 to 4 minutes.
3Reduce the heat to low and let the syrup simmer gently for 5 minutes without stirring.
4The syrup should thicken slightly and become clear; remove it from the heat once it coats the back of a spoon.
5Allow the syrup to cool for 10 minutes at room temperature.
6Then stir in your chosen flavored extract and food coloring until the color is evenly distributed and the syrup is fully combined.
7Pour the finished syrup into a clean glass jar or bottle and let it cool completely before sealing.
8Store the syrup in the refrigerator for up to 2 weeks, and shake well before each use.

🔧Equipment

Medium saucepan
Whisk
Liquid measuring cup
Glass jars or bottles for storage

📊Nutrition Facts (per serving)

🔥Calories: 80 kcal🧈Total Fat: 0g💛Saturated Fat: 0g❤️Cholesterol: 0mg🧂Sodium: 0mg🌾Total Carbs: 20g🥦Dietary Fiber: 0g🍬Sugars: 20g🥩Protein: 0g

📝Notes

For best results, use clear extracts and gel food coloring to avoid cloudiness. You can also combine multiple extracts for unique flavor blends.

Watch Video Of How Classic Snow Cone Syrup Works

To store your homemade snow cone syrup, pour it into a clean glass jar or bottle and keep it in the refrigerator for up to two weeks. If you want to keep it longer, pour the syrup into ice cube trays and freeze, then pop out a cube whenever you need a single serving.

Just thaw the cube in the fridge or microwave it for a few seconds before using. When you are ready to serve, shave or crush your ice and drizzle the syrup over the top.

You can also use this syrup on pancakes, ice cream, or in cocktails for adults. It is a versatile recipe that works for any occasion, from a kid’s birthday party to a quiet evening at home.

I always keep a few flavors in the fridge during summer, and my family knows they can grab a snow cone anytime they want a cool treat.

❓ Frequently Asked Questions About Snow Cone Syrup

Q: What type of sugar should I use in this recipe?

A: You can use either granulated sugar or superfine sugar in this recipe – both work well. If you’re looking for a slightly different flavor profile, you could even try using honey or agave nectar instead.

Q: How long does this syrup keep in the fridge?

A: This syrup will typically keep for several weeks in the fridge when stored properly in an airtight container. Just give it a good stir before using.

Q: Can I make this syrup without an ice cream maker?

A: Yes, you can make this syrup without an ice cream maker – simply mix all the ingredients together and freeze until set. This will give you a slightly chunkier texture than if you were to use an ice cream maker.

Q: Is this syrup suitable for people with dietary restrictions?

A: This syrup is vegetarian-friendly and vegan-friendly when made with plant-based milk alternatives – just be sure to check the labels on your ingredients for any hidden animal-derived products.

Q: How do I store leftover snow cone syrup?

A: You can store leftover snow cone syrup in an airtight container in the fridge for up to two weeks or freeze it for longer-term storage.

Similar Posts